Hexo 博客搭建 (2) - 个性化需求配置
Hexo-Next 我主要的配置需求:
- 基础的美化与功能
- 数学公式
- 公益404
- 图片插入
注:强烈不建议在文章文件名称与图片名称中出现空格,我们可以在md文件名称中不使用空格,在文件中
title 字段中,使用包含空格的文章标题。
一些基础美化与功能配置
- 开始使用 - NexT 使用文档 (simpleyyt.com)
- 少数派
- GitHub - next-theme/hexo-word-counter: ⏱️ 用 Rust 编写的 Hexo 文章的字数和阅读时间
- https://www.cnblogs.com/LyShark/articles/16518392.html
- https://www.cnblogs.com/cscshi/p/15196102.html
- Hexo-NexT 添加图片 - 锦瑟,无端 - 博客园 (cnblogs.com)
Next 主题使用 Pandoc 展示数学公式
参考
- https://hexo-next.readthedocs.io/zh-cn/latest/next/advanced/%E9%85%8D%E7%BD%AEMathJax/
- https://github.com/jgm/pandoc/blob/master/INSTALL.md
- https://blog.csdn.net/weixin_45073562/article/details/120289648
- https://blog.barku.re/2024/04/20/%E5%BD%BB%E5%BA%95%E8%A7%A3%E5%86%B3-Hexo-%E7%9A%84%E6%95%B0%E5%AD%A6%E5%85%AC%E5%BC%8F%E6%B8%B2%E6%9F%93%E9%97%AE%E9%A2%98/
总结
- 安装
Pandoc
1 | winget install --source winget --exact --id JohnMacFarlane.Pandoc |
- 插件变动
1 | npm uninstall hexo-math --save |
主题配置文件修改:可以自行参考:https://github.com/next-theme/hexo-filter-mathjax?tab=readme-ov-file#options
重启电脑,重启 VSCode
重新构建
1 | hexo clean |
添加图片
参考: https://www.cnblogs.com/cscshi/p/15196100.html
安装插件,在
hexo根目录下执行1
npm install hexo-asset-image --save
打开
hexo的配置文件_config.yml,将post_asset_folder,把这个选项从false改成true打开
hexo根目录下的/node_modules/hexo-asset-image/index.js,将内容更换为下面的代码。(此步骤不知道是否真的有效,我没用此步骤也可以,可能遇到的问题不一样,建议执行此步骤的时候先备份 index.js 文件)
1 | ; |
实际上安装了 hexo-asset-image --save 插件后,通过
hexo new post *** 指令新建博文,除了在
~/source/_post/ 目录下新建 .md
文件外,还会新建一个同名的文件夹,图片直接放这个文件夹即可。在生成静态页面的时候,hexo
会将 .md文件和图片放在一个文件夹内。 如果不通过
hexo new post *** 指令新建博文,可以直接在
_post 目录下新建
.md(注意自己加头部),以及同名的文件夹,将图片放这文件夹下效果一样。
插入图片。语法和 markdown 语法一致。
1
2![]() # [描述,不能为空,否则不会显示,md 下是可以不写的](图片完整名称)
# eg. ,注意 test.jpg 是按要求放在与此 .md 文件同名的文件夹内。一般我个人习惯于使用
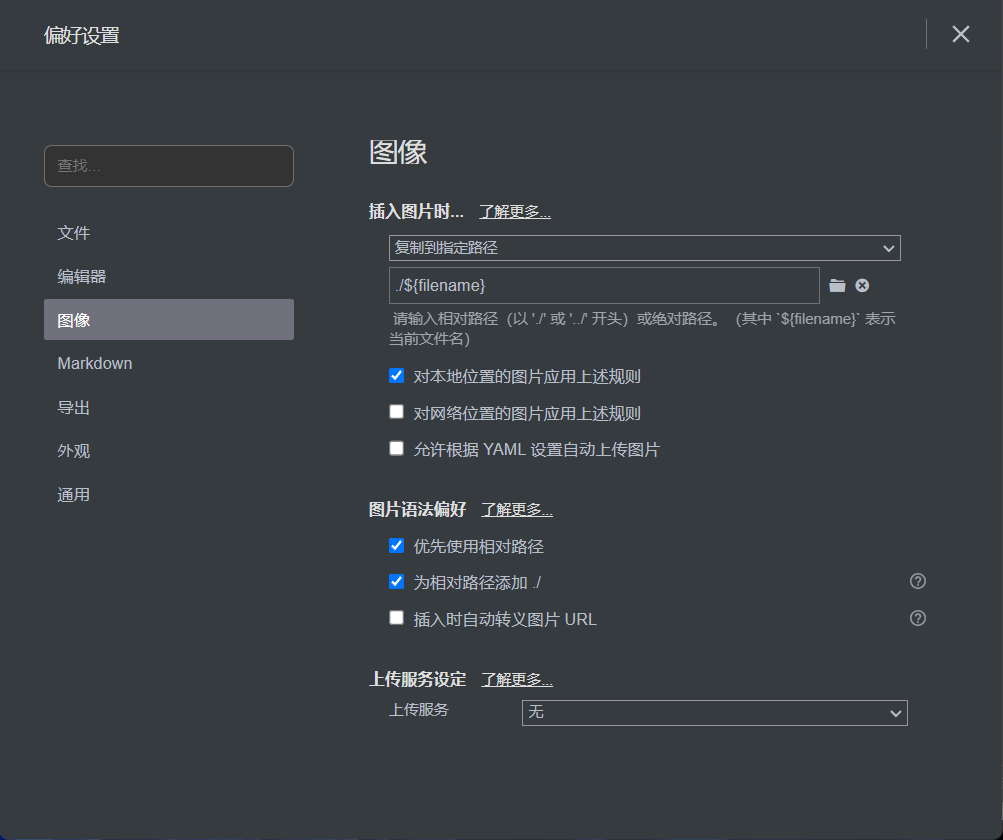
Typora进行 Markdown 写作,粘贴图片比较方便,我们可以在文件-偏好设置-图像中设置复制到指定路径为./${filename},因为hexo new <md file>创建的文件夹不包含.asset后缀。另外,一般还可以勾选对本地位置图片应用上述规则,优先使用相对路径,为相对路径添加 ./
- 重要:如果遇到还是不能加载图像的问题,首先检查图片路径中是否含有空格,请其中的空格全部替换为
%20
公益404
参考:https://docs.github.com/en/pages/getting-started-with-github-pages/creating-a-custom-404-page-for-your-github-pages-site
注意,对 Github Pages 的二级域名是无效的,只有自己买域名搭建的才有效。
但是我们可以直接在导航栏中添加一个,以下是方法:
- 在 主题配置文件中 搜索
commonweal设置为true hexo new page 404- 在
.\source\404\index.md中添加以下代码:
1 |
|
- 重新构建
1 | hexo clean |
文章过长时分段显示
参考:https://blog.csdn.net/RayDon03/article/details/104441437
自动化貌似不太好整,所以自己使用 <!-- more -->
也可以选择使用 description 这个
front0-matter
证实: https://hexo-next.readthedocs.io/zh-cn/latest/next/base/%E9%A6%96%E9%A1%B5%E9%A2%84%E8%A7%88/
1 | # 这个选项貌似没有用 |
折叠过长的代码块
https://homulilly.com/post/hexo-next-add-code-folding.html
貌似现在不支持,以后可能也不打算支持,所以暂时不考虑,不浪费太多精力了。